
Introduction
A living room can feel almost finished, then one missing piece makes the whole space look incomplete. A diy coffee table fixes that problem in a personal, budget-friendly way because you get to build something that fits your sofa, your style, and your daily life.
The best part is not only saving money. It is the small feeling of pride when someone says, “Where did you buy that?” and you get to smile because you made it yourself.
A coffee table holds more than mugs and remotes. It becomes the center of lazy evenings, weekend snacks, board games, magazines, flowers, laptops, and those tiny everyday moments that make a house feel lived in.
This guide walks you through styles, sizes, materials, tools, costs, safety, building steps, finishing ideas, and common mistakes. By the end, you will know how to plan a table that looks good, feels sturdy, and actually works in your room.
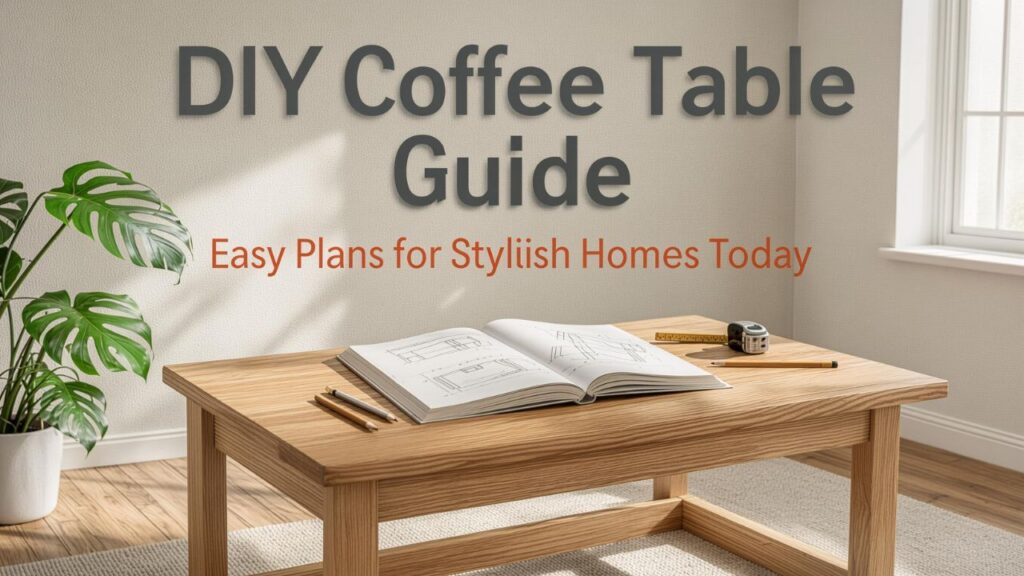
Table of Contents
- Why Build Your Own Coffee Table?
- What Makes a Good DIY Coffee Table?
- Best Coffee Table Sizes for Real Living Rooms
- Tools and Materials You May Need
- Beginner-Friendly DIY Coffee Table Ideas
- How to Build a Simple Coffee Table
- Wood Choices and Material Comparison
- Finishing, Staining, and Painting Tips
- Safety Tips Before You Start
- Budget Planning and Cost Ideas
- Styling Your Finished Coffee Table
- Common Mistakes to Avoid
- Personal Background, Project Journey, and Value
- FAQs
- Conclusion
Why Build Your Own Coffee Table?
Buying furniture is easy until the size is wrong, the finish feels cheap, or the price makes your heart sink. A store-bought table may look nice online, but once it lands in your living room, it can feel too bulky, too short, too shiny, or just not “you.”
Building your own table gives you more control. You choose the length, height, wood tone, leg style, storage, edge detail, and finish. That freedom is helpful in small apartments, awkward living rooms, rental homes, and family spaces where standard furniture does not always behave.
A diy coffee table can also be kinder to your budget. You can reuse wood, upgrade an old table, build from pine boards, or add premium touches only where they matter most. The final result does not need to look homemade. With patient sanding and a clean finish, it can look surprisingly polished.
There is also a slower, more emotional reason. Making furniture connects you to your home. Every little mark, join, and finish choice tells a story. That kind of piece often feels warmer than something picked from a showroom floor.
What Makes a Good DIY Coffee Table?
A good coffee table should be attractive, sturdy, comfortable to use, and properly sized for the room. It should not wobble when someone sets down a mug. It should not block walking space. It should not look like it is fighting the sofa.
Simple Definition
A coffee table is a low table placed near seating, usually in front of a sofa or sectional, used for drinks, books, decor, remotes, snacks, and casual everyday use.
A good homemade version has four basic qualities:
- Stable structure
- Comfortable height
- Useful surface area
- Finish that matches the room
The best designs also fit your lifestyle. A family with kids may want rounded corners and a durable finish. A small apartment may need hidden storage. A minimalist room may need a slim table with clean lines. A cozy farmhouse living room may look better with chunky wood and a softer, aged finish.
Best Coffee Table Sizes for Real Living Rooms
Before cutting wood, measure your room. Many beginner projects fail because the table looks cute by itself but feels awkward next to the sofa.
Interior designers often recommend choosing a coffee table close to the sofa seat height or slightly lower. Some design guides suggest the table should be about 1 to 2 inches lower than the sofa seat, while placement guides commonly recommend leaving about 14 to 18 inches between the sofa and table for comfortable reach and leg room.
Southern Living also shares a common design rule: the coffee table can be roughly two-thirds the length of the sofa, which helps the table feel balanced instead of too tiny or oversized.
Coffee Table Size Guide
| Sofa Size | Suggested Table Length | Suggested Width | Suggested Height |
|---|---|---|---|
| Small loveseat | 30–40 inches | 18–22 inches | 15–18 inches |
| Standard sofa | 42–54 inches | 22–28 inches | 16–18 inches |
| Large sofa | 54–64 inches | 24–32 inches | 16–20 inches |
| Sectional | 36–54 inches, depending on layout | 24–36 inches | 16–20 inches |
| These are not strict rules. They are starting points. In reality, your rug size, sofa arms, walking paths, and room shape matter too. |
Spacing Around the Table
Leave enough space to move without bruising your knees. A tight living room may need a narrower table, an oval shape, or a nesting design. A larger room may need a wider table so the seating area does not feel empty.
For walking paths around furniture, some interior layout guides recommend about 36 inches where people regularly pass through a room.
Tools and Materials You May Need
You do not need a full workshop to build a simple table. Many projects can be done with basic tools, especially if your lumber store cuts boards to rough size.
Basic Tool List
- Tape measure
- Pencil
- Speed square
- Clamps
- Drill or driver
- Screws
- Wood glue
- Sandpaper or orbital sander
- Saw, if cutting at home
- Paintbrush, foam roller, or staining cloth
- Safety glasses
- Dust mask or respirator
- Hearing protection
For a more polished project, you may also use a pocket-hole jig, miter saw, circular saw, brad nailer, wood filler, edge banding, router, or dowel jig.
Basic Material List
- Wood boards or plywood
- Table legs or framing lumber
- Screws or bolts
- Wood glue
- Wood filler
- Primer, stain, paint, or sealant
- Felt pads for the bottom
- Optional drawer slides, baskets, shelf boards, or casters
Retail material prices change often, but current online listings show how wide the range can be. For example, Home Depot’s 2 ft. x 4 ft. plywood project panels include several options from low-cost OSB panels to sanded plywood panels, with listed prices ranging from only a few dollars to the higher twenties depending on thickness and type.
Beginner-Friendly DIY Coffee Table Ideas
A beginner project should be simple enough to finish, but not so plain that you feel disappointed. Start with a shape you can build cleanly.
1. Simple Rectangle Wood Table
This is the classic beginner build. Use a rectangular top, four legs, and basic apron supports underneath. It works in modern, farmhouse, rustic, and transitional rooms.
You can make it with pine boards for a budget build or hardwood boards for a more refined look. The style changes quickly depending on the legs. Square legs feel modern. Tapered legs feel mid-century. Chunky legs feel farmhouse.
2. Plywood Box Coffee Table
A plywood box design gives you clean lines and built-in storage. It can be open on one side for books or baskets. It can also be painted for a sleek, modern look.
This is a smart choice for small spaces because the shape is simple and functional. Add edge banding to hide plywood layers if you want a more finished appearance.
3. Hairpin Leg Coffee Table
Hairpin legs are popular because they instantly make a simple wood top look stylish. You can attach them to a wood slab, plywood top, or reclaimed board panel.
This style is forgiving for beginners because the legs are purchased ready-made. Your main job is preparing a clean top and attaching the legs evenly.
4. Storage Coffee Table
A storage table can hide blankets, games, remotes, and magazines. You can build it as a lift-top table, trunk-style table, shelf table, or drawer table.
For beginners, an open lower shelf is easier than drawers. It still gives useful storage without complicated moving parts.
5. Pallet Coffee Table
A pallet table can look relaxed and rustic, but choose pallets carefully. Avoid dirty, chemically treated, broken, or mystery pallets. Sand thoroughly because rough pallet wood can leave splinters.
A pallet table works well on a porch-style room, casual apartment, game room, or budget rental setup. Add casters if you want it to move easily.
6. Round Coffee Table
A round table softens a room with lots of straight lines. It is also helpful around kids because there are no sharp corners.
The challenge is cutting a perfect circle. Beginners can use a pre-cut round tabletop from a hardware store, then add legs or a base.
7. Ottoman-Style Coffee Table
An upholstered table feels cozy and family-friendly. You can build a simple wood base, add foam, wrap fabric over the top, and secure it underneath.
Add a tray when you need a firm surface for drinks. This is a lovely choice for a lounge room where comfort matters more than hard edges.
How to Build a Simple Coffee Table
This section gives a beginner-friendly plan for a basic rectangle table. Adjust the measurements based on your sofa and room.
Project Size Example
For many standard sofas, a table around 44 inches long, 24 inches wide, and 17 inches high works well. That size gives enough surface area without overwhelming the room.
Materials for This Build
| Item | Suggested Quantity | Notes |
|---|---|---|
| 1×6 boards for tabletop | 4 boards | Cut to 44 inches |
| 2×2 or 2×4 legs | 4 pieces | Cut to finished height |
| Apron boards | 4 pieces | Support under tabletop |
| Wood screws | 1 box | Choose correct length |
| Wood glue | 1 bottle | Helps reduce movement |
| Sandpaper | 80, 120, 180, 220 grit | For smoother finish |
| Stain or paint | As needed | Match room style |
| Topcoat | As needed | Protects from daily use |
Step 1: Plan the Size
Measure your sofa seat height, sofa length, rug, and walking space. Choose a table that feels useful but does not block the room.
A diy coffee table should support how you actually live. If you eat snacks on the sofa, go wider. If your living room is narrow, go slimmer.
Step 2: Cut the Top Boards
Cut your tabletop boards to the same length. If you are not confident with a saw, ask the store to cut them. Many home centers offer cutting services, though accuracy can vary.
Lay the boards side by side and choose the nicest faces for the top. Flip boards around until the grain pattern looks pleasing.
Step 3: Join the Top
You can join boards with pocket holes, wood glue and clamps, biscuit joints, dowels, or support battens underneath. For beginners, underside support boards are easier.
Apply wood glue along the board edges, clamp the top flat, then attach support pieces underneath. Keep screws short enough so they do not poke through the surface.
Step 4: Build the Base
Attach apron boards between the legs to create a strong frame. The apron keeps the legs from wobbling and gives the tabletop something solid to sit on.
Check for square corners before driving all screws. A small mistake here can make the table rock later.
Step 5: Attach the Top
Set the tabletop upside down on a soft surface. Center the base on it. Attach the base with screws through the apron or mounting plates.
Wood expands and contracts with humidity, so avoid locking wide solid boards too tightly if your design allows movement. In humid places, this matters even more.
Step 6: Sand Everything
Start with rough grit only if needed, then move gradually to finer grit. Do not jump from very rough to very fine too quickly.
Round the edges slightly by hand. Even a tiny softened edge makes the table feel better and helps stain or paint wear more naturally.
Step 7: Fill Gaps and Holes
Use wood filler for screw holes, small cracks, and dents. Let it dry fully, then sand smooth.
If you plan to stain, choose stainable wood filler and test it first. Some fillers absorb stain differently and can leave patchy marks.
Step 8: Apply Finish
Paint, stain, oil, or seal the table based on your design. A clear topcoat helps protect against water rings, snacks, dust, and daily handling.
Let finishes cure properly before heavy use. Dry-to-touch does not always mean fully cured.
Wood Choices and Material Comparison
The material affects weight, cost, durability, look, and ease of building.
| Material | Best For | Pros | Watch Out For |
|---|---|---|---|
| Pine | Beginner and budget builds | Affordable, easy to cut, widely available | Dents easily |
| Oak | Durable furniture | Strong, attractive grain | More expensive and harder to cut |
| Poplar | Painted tables | Smooth, stable, easy to work | Not ideal for rich stain |
| Plywood | Modern box tables | Flat, stable, budget-friendly | Edges need finishing |
| Reclaimed wood | Rustic character | Unique, warm, sustainable feel | May be warped, dirty, or nail-filled |
| MDF | Painted modern tables | Smooth surface, low cost | Heavy and weak around moisture |
| For a first diy coffee table, pine or plywood is often the easiest choice. Pine is forgiving and easy to find. Plywood is stable and great for clean, boxy designs. | |||
| Hardwoods look beautiful, but they are less forgiving for beginners. If your cuts are not clean or your tools are basic, expensive hardwood can create pressure. Start with a material that lets you learn without fear. |
Finishing, Staining, and Painting Tips
Finishing is where a simple table becomes furniture. A rushed finish can make a good build look cheap, while careful sanding and coating can make budget wood look surprisingly elegant.
Stain for Warmth
Stain brings out wood grain and adds warmth. Light oak tones feel natural and airy. Medium walnut tones feel cozy and timeless. Dark stains can look dramatic but may show dust and scratches more easily.
Always test stain on scrap wood. The same stain can look very different on pine, oak, plywood, and poplar.
Paint for a Clean Look
Paint is great when the wood grain is not special or when you want the table to match built-ins, walls, or trim. White, black, olive, navy, warm beige, and soft gray are common choices.
Use primer before paint, especially on raw wood. Primer helps the color sit evenly and improves durability.
Clear Coat for Protection
A coffee table gets used hard. It may face mugs, water, books, feet, toys, laptops, and snacks. A protective topcoat is worth it.
Popular finish options include water-based polyurethane, oil-based polyurethane, hard wax oil, furniture wax, and clear acrylic sealer.
Distressed Finish
A distressed finish works well for farmhouse, cottage, vintage, or rustic rooms. Sand edges lightly after painting, then seal the surface.
Do not overdo distressing. A few natural-looking worn edges feel charming. Too many scratches can look fake.
Safety Tips Before You Start
DIY furniture should be fun, not frightening. Go slowly, especially if you are new to power tools.
The U.S. Consumer Product Safety Commission advises DIY users to read and follow power tool instructions, use tools correctly, and avoid unsafe handling. OSHA also describes personal protective equipment as protection that may include gloves, safety glasses, earplugs or muffs, respirators, and other items that reduce exposure to hazards.
Basic Safety Checklist
- Wear safety glasses when cutting, drilling, or sanding
- Use hearing protection with loud saws
- Wear a dust mask or respirator while sanding
- Clamp wood before cutting
- Keep fingers away from blades and bits
- Unplug tools before changing blades or bits
- Work in a ventilated area
- Keep loose sleeves, jewelry, and long hair away from moving parts
- Read tool manuals before use
- Keep children and pets away from the workspace
OSHA’s woodworking guidance also focuses on hazards from machines and processed wood materials, which is a useful reminder that even small furniture projects deserve careful habits.
Budget Planning and Cost Ideas
A diy coffee table can be very affordable or surprisingly expensive. It depends on the material, legs, finish, hardware, and tools you already own.
Simple Budget Ranges
| Project Type | Possible Budget Range | Notes |
|---|---|---|
| Pallet or reclaimed table | Low cost | Best if wood is safe and clean |
| Pine board table | Budget-friendly | Great for beginners |
| Plywood box table | Budget to mid-range | Clean modern look |
| Hairpin leg table | Budget to mid-range | Legs may cost more than wood |
| Hardwood table | Higher cost | Best for a long-term piece |
| Lift-top storage table | Mid to higher cost | Hardware adds cost |
| These ranges are general because prices change by city, store, wood species, and availability. Small hardware choices can also add up. |
Where the Money Goes
Your main costs may include:
- Wood
- Legs or framing lumber
- Screws and brackets
- Wood glue
- Sandpaper
- Stain or paint
- Clear coat
- Brushes or rollers
- Optional hardware
- Tool rental or tool purchase
If you already own basic tools, the project may cost much less. If you need to buy a saw, sander, drill, clamps, and safety gear, your first project may feel more expensive. The good news is that those tools can be reused for shelves, benches, planters, desks, and future furniture.
Styling Your Finished Coffee Table
Once your table is built, styling helps it feel intentional. You do not need a magazine-perfect setup. You need a surface that looks good and still works for daily life.
Easy Styling Formula
Use three simple layers:
- A tray for structure
- Books for height
- One natural element, such as flowers, branches, or a plant
Then leave empty space. A table covered edge-to-edge with decor becomes annoying fast. You still need room for coffee, snacks, remotes, and life.
Styling by Room Mood
| Room Style | Styling Ideas |
|---|---|
| Modern | Ceramic tray, sculptural bowl, simple books |
| Farmhouse | Woven basket, candle, rustic vase |
| Coastal | Light books, glass vase, natural texture |
| Industrial | Metal tray, dark wood, leather accents |
| Minimal | One book stack and one object |
| Family-friendly | Soft basket, storage box, rounded decor |
| A handmade table should not feel too precious. Let it be used. A few small marks over time can make it feel even more personal. | |
| Infographic: DIY coffee table process showing six steps: measure your sofa, choose a style, buy materials, build the frame, sand and finish, style the table. |
Common Mistakes to Avoid
Mistakes are part of DIY, but some are easy to prevent.
Making the Table Too Tall
A coffee table that sits higher than the sofa seat can feel awkward. It may work for games or eating, but it can look visually heavy.
Measure first. Do not guess based on a photo.
Choosing the Wrong Wood
Soft pine is easy to use but dents. MDF paints nicely but dislikes moisture. Reclaimed wood has character but may need more prep.
Choose material based on use, not only looks.
Skipping Sanding
Sanding feels boring, so beginners rush it. Unfortunately, rough sanding marks become more obvious after stain.
Take your time. Smooth edges and a clean top make the whole table feel better.
Weak Leg Attachment
Wobbly legs make a table feel cheap and unsafe. Use strong joinery, proper screws, brackets, aprons, or mounting plates.
If the base feels weak before the top is attached, fix it before moving on.
Forgetting Daily Use
A glassy black finish may look beautiful, but it may show dust, fingerprints, and scratches. A rough reclaimed top may look cool but make writing or cleaning difficult.
Think about how you live. A diy coffee table should suit your habits, not only your mood board.
Using No Protective Topcoat
Raw wood absorbs stains, oils, and water quickly. A clear coat protects the surface and makes cleaning easier.
If your home has kids, pets, or frequent guests, choose durability over delicate finishes.
Personal Background, Project Journey, and Value
This topic does not involve a public person, so personal net worth is not relevant. Still, there is a meaningful “personal background” behind every handmade furniture project.
Personal Background
Most people who build a table are not professional woodworkers. They are renters, homeowners, students, parents, newlyweds, small-space decorators, or creative people who want a better room without paying designer furniture prices.
That makes the project approachable. You do not need years of experience. You need a careful plan, safe tools, patience, and a willingness to fix small mistakes.
Project Journey
The journey usually starts with frustration. Maybe every store table is too expensive. Maybe the right size does not exist. Maybe the living room feels bland. Then you start looking at ideas, sketch a rough plan, buy wood, sand longer than expected, and slowly watch a real piece of furniture appear.
That journey has value. It teaches measuring, patience, problem-solving, and respect for craftsmanship. Even if the first table is not perfect, it becomes a piece of your home’s story.
Achievements
A successful build gives you more than a table. It gives you:
- A custom piece that fits your room
- Better understanding of furniture quality
- Confidence with tools
- A more personal living space
- Skills for future projects
- Possible savings compared with premium furniture
Financial Insights
The “net worth” of a DIY project is not only its resale value. It is the difference between what you spend, what you learn, and how much use you get from the piece.
A $90 table that lasts five years and makes your living room feel complete has real value. A $500 table you dislike after three months does not.
Best DIY Coffee Table Styles by Skill Level
Choosing the right project for your skill level keeps the experience enjoyable.
| Skill Level | Best Style | Why It Works |
|---|---|---|
| Beginner | Hairpin leg table | Simple top, easy leg attachment |
| Beginner | Crate table | Built-in storage, little cutting |
| Beginner to intermediate | Pine rectangle table | Teaches basic framing |
| Intermediate | Round table | Needs cleaner cutting and layout |
| Intermediate | Drawer table | Requires careful measuring |
| Advanced | Lift-top table | Hardware and alignment matter |
| Advanced | Hardwood slab table | Heavy, costly, needs precision |
| If this is your first project, choose simple over impressive. A clean, sturdy beginner table is better than a complicated half-finished one sitting in the garage. |
Small Living Room Ideas
Small rooms need smart furniture. A bulky table can make the space feel crowded.
For a compact room, consider:
- Round or oval shape
- Thin legs
- Open shelf
- Light wood finish
- Clear acrylic base
- Nesting table design
- Narrow rectangle shape
- Hidden storage
A small diy coffee table can still feel special. Use better proportions, not bigger size, to make it stand out.
Family-Friendly Design Tips
If children use the room, design with comfort and safety in mind.
Choose rounded corners, stable legs, durable finish, and washable styling pieces. Avoid sharp metal edges, fragile glass, and unstable tall decor.
A lower shelf can hold baskets for toys and books. This keeps the table useful while helping the room feel less chaotic.
Rental-Friendly Coffee Table Ideas
Renters often need furniture that moves easily and does not cost too much.
Good rental-friendly ideas include:
- Lightweight plywood table
- Crate table on casters
- Hairpin leg wood table
- Painted thrift-store makeover
- Nesting coffee tables
- Storage trunk table
A diy coffee table for a rental should be movable, affordable, and flexible enough to work in your next place too.
Coffee Table Makeover Ideas
You do not always need to build from scratch. Sometimes the best project starts with a tired old table.
Paint Makeover
Sand lightly, prime, paint, and seal. This can completely change a dated table.
New Top
Replace a damaged top with new wood boards, plywood, tile, or a stone-look panel.
New Legs
Changing legs can shift the entire style. Hairpin legs feel modern. Turned legs feel classic. Block legs feel bold.
Contact Paper or Veneer
Peel-and-stick finishes can work for temporary updates, but they may not last as long as paint or real veneer.
Tile Top
Tile adds color and pattern. Use proper adhesive and grout, and make sure the base can support the added weight.
FAQs
Is a diy coffee table hard to build?
Not always. A simple rectangle table with purchased legs or basic framing is beginner-friendly. More complex designs with drawers, lift tops, or round cuts need more skill.
What wood is best for a beginner coffee table?
Pine and plywood are usually the easiest beginner choices. Pine is affordable and simple to cut, while plywood stays flat and works well for modern box designs.
How tall should a coffee table be?
Most coffee tables look and feel best near the height of the sofa seat or slightly lower. Measure your sofa before choosing the final height.
How far should a coffee table be from the sofa?
A common range is about 14 to 18 inches from the sofa. This gives enough room for legs while keeping drinks, books, and remotes within reach.
Can I build a coffee table without a saw?
Yes, if you use pre-cut boards, a ready-made tabletop, crates, or store cutting services. You can also use purchased legs to make the build simpler.
How do I stop my coffee table from wobbling?
Use strong leg attachments, add apron boards or corner brackets, check for square corners, and make sure all legs are the same length. Felt pads can help with uneven floors.
Should I stain or paint my coffee table?
Stain is best when the wood grain looks attractive. Paint is better for plywood edges, mixed woods, old furniture makeovers, or rooms that need a clean color.
Do I need to seal the table?
Yes, sealing is strongly recommended. A coffee table faces spills, mugs, fingerprints, snacks, and cleaning, so a protective topcoat helps it last longer.
What is the cheapest way to make one?
Use reclaimed wood, crates, pallets, or pine boards with basic legs. Keep the shape simple and spend more time on sanding and finishing.
Can a handmade coffee table look professional?
Yes. Straight cuts, even sanding, tight joints, proper proportions, and a clean finish can make a handmade table look polished and store-quality.
Conclusion
A handmade coffee table can change the way your living room feels. It adds function, warmth, and personality in a way that store-bought furniture does not always manage.
Start with your sofa, your room size, and your daily habits. Then choose a simple design, safe tools, solid materials, and a finish that suits your home. The result does not have to be perfect to be beautiful.
A diy coffee table is more than a weekend project. It is a chance to build something useful with your own hands, save money where it makes sense, and create a living room that feels a little more like home.